The Activities Search commands open the Activities Search screen, which shows ALL activities at ANY facilities in ALL categories scheduled at your Property, in scrollable list form organized by date. The Activities Search (historical) command opens the screen showing past dates, while the Activities Search (future) command shows activities scheduled for the present date and in the future. The list shows start and end dates for the scheduled activities, with the first and last name of the guest, the room name for the location the activity will take place in, the specific activity name, the name of the attendant administering the activity if applicable, and the Guest ID and Stay ID associated with the activity. The Activities Search screen also allows you to open the specific Activity screen, the Activity Schedule screen, and if relevant the Guest Record or the Stay Record for any of the Activity entries listed on the screen.
Note: An activity does NOT have to be associated with a Stay. For example, your Property may have a day-use spa, or a golf course open to the public. You do not even have to associate it with a specific guest or group (although it is recommended).
The Activities Search commands are part of our Spas and Activities Module. If your Property does not currently have our Spa & Activities Module and you are interested in adding it, please contact us at Sales@SkywareSystems.com.
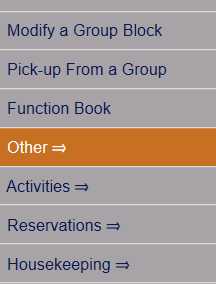
Depending on your Property's configuration, you may be able to access the Activities Menu directly from the Quick Menu.
Select Other from the Quick Menu on the left to be taken to the Other Front Desk Tasks Menu.
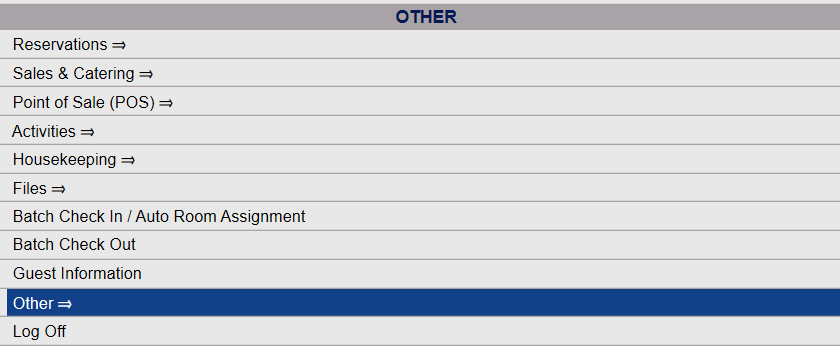
Or select Other => from the Other section (bottom right) of the Full Menu.
Click the icon on the left for the Full menu.
This will display the Full menu in a tabular form, with four sections, Registration, Status, Cashier and Other.
From the Other Section, select Other =>.
This will display the Other Front Desk Tasks Menu, which has four sections, Other List 1, Other List 2, Documents and Web.
Select Activities from the Other Front Desk Tasks menu, Other List 1 section.
This will open the Activities Menu, which has two sections, Items and Reports.
The Activities search commands are in the Items section. Select (Future) or (Historical).
or
When selected the Activities Search screen will open.
Scheduled activities will be organized in descending Date order by default, with field information for each scheduled activity displayed left to right. The list shows start and end dates for the scheduled activities, the first and last name of the guest, the room name for the location the activity will take place in, the specific activity name, the first and last name of the attendant administering the activity if applicable, and the Guest ID and Stay ID associated with the activity.
The list of scheduled activities may be very large. You can use one, some, or all the fields to filter the list by entering the search term into the field below the column name and clicking the gray button Search to generate a new list using your search parameters.
By default, the first list entry will be selected. To change the selected activity click on the list entry. Depending on the Guest ID and Stay ID fields in the activity entry, the available buttons in the local tool bar may change.
Any scheduled activity will have an Activity screen associated with it. The Activities Search screen lists all scheduled activities in descending Date order. To view the associated Activity screen, first select the activity you wish to view by clicking on the list entry. This will highlight the activity in the list.
Next, click the gray "Activity" button in the local tool bar.
This will open the specific Activity screen for the selected list entry allowing you to view and amend any details (IF the scheduled activity has not yet taken place. Once the date has passed, the record is deemed historic and becomes view only).
Note: The specific Activity Screen opens in a different tab, leaving the Activities search screen open.
Any scheduled activity will have an entry on the Activity Schedule associated with it. The Activities Search screen lists all scheduled activities in descending Date order. To view the associated entry on the Activity Schedule, first select the activity you wish to view by clicking on the list entry. This will highlight the activity in the list.
Next, click the gray "Schedule" button in the local tool bar.
This will open the Activity Schedule screen showing the selected list entry activity.
Note: The Activity Schedule screen opens in a different tab, leaving the Activities Search screen open.
Any scheduled activity may have a Guest Record associated with it (recommended). Any scheduled activity without an associated Guest Record will have a 0 (zero) in the Guest ID field.
The Activities Search screen lists all scheduled activities in descending Date order. To view the associated entry on the Activity Schedule, first select the activity you wish to view by clicking on the list entry. This will highlight the activity in the list.
Note: If no Guest Record is associated with an entry, when the entry is selected on the Activities Search screen the Guest Record button will no longer be available. Only if the selected scheduled activity has a Guest Record associated with it will the Guest Record button will be available in the local tool bar.
Next, click the gray "Guest Record" button in the local tool bar.
This will open the Guest Account screen for the Guest ID associated with the selected list entry.
Note: The Guest Account screen opens in a different tab, leaving the Activities Search screen open.
Any scheduled activity may have a Stay Record associated with it, but an activity does NOT have to be. For example, your Property may have a day-use spa, or a golf course open to the public. . Any scheduled activity without an associated Stay Record will have a 0 (zero) in the Stay ID field.
The Activities Search screen lists all scheduled activities in descending Date order. To view the associated entry on the Activity Schedule, first select the activity you wish to view by clicking on the list entry. This will highlight the activity in the list.
Note: If no Stay Record is associated with an entry, when the entry is selected on the Activities Search screen the Stay Record button will no longer be available. Only if the selected scheduled activity has a Stay Record associated with it will the Stay Record button will be available in the local tool bar.
Next, click the gray "Stay Record" button in the local tool bar.
This will open the Folio screen associated with the Stay ID, open to the Additional Names and Services tab, where ALL scheduled activities for the Stay ID will be displayed.
Note: The Folio screen opens in a different tab, leaving the Activities Search screen open.
Date Updated June 10, 2021